To set triggers for every campaign in your account, follow these instructions:
- Go to the SafeCPC dashboard
- From left navigation, select Tools -> Manage detection rules
- Now you can see the Click Fraud section, with detection rules triggers and actions.
Adding single rule

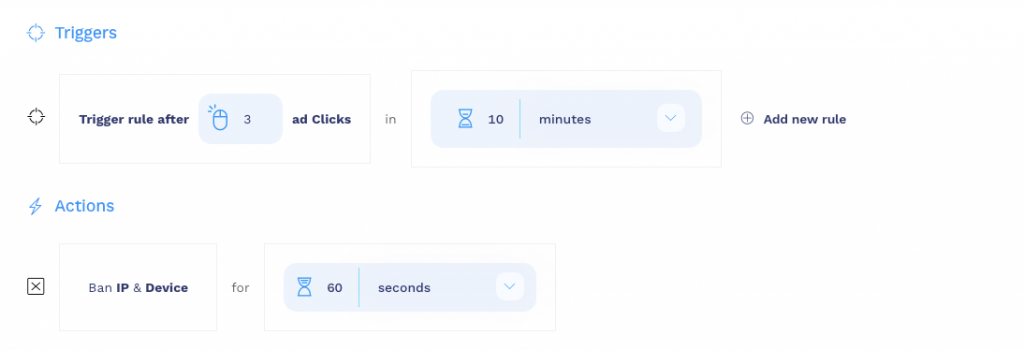
First, set trigger, after how many clicks in given time the trigger will activate action. You can define timeframe as:
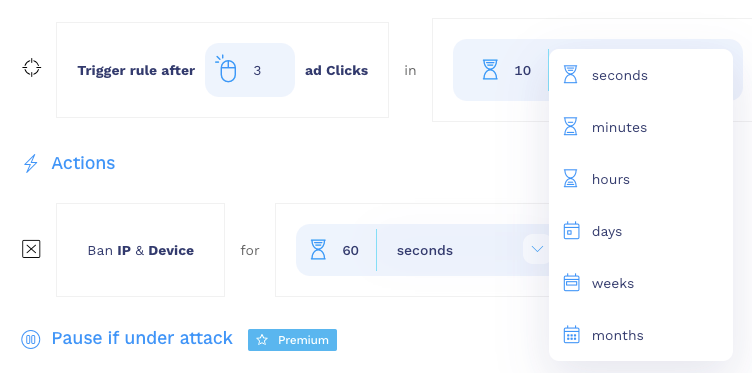
Next, you can set an action. Default action is Ban IP and the device. You can set here, after what timeframe ban will release.
Setting low ban times, will give you more precision regarding banned IPs because Google, give users an option to ban up to 500 entries (IPs/ranges).
So If you set the ban to hold for 10 months, the newest banned IP will remove the oldest from the list.
IMPORTANT
Manually added IPs / Ranges will stay. SafeCPC will copy these every update.
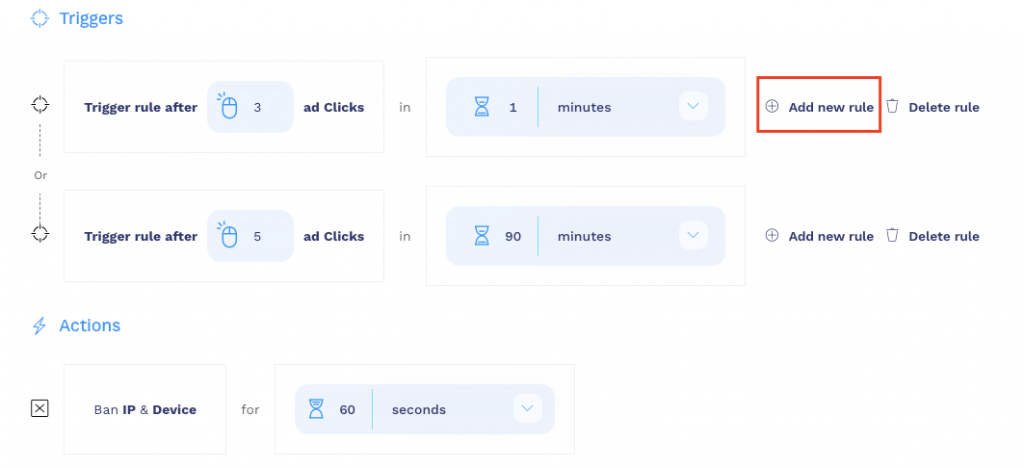
Adding multiple rules
If you want, you can add more than one trigger for every campaign.
To do so, click on the Add new rule button, next to the first trigger. You’ll see second trigger options: